
우선 이전 블로그에서 React의 개발 환경을 갖춘 바 있다. 이에 기반해서 유용한 plugin에 대해 소개 하고자 한다. 우선 완성된 코드를 여러분들에게 보여주고 이에대한 설명을 진행하도록 하겠다.
Source Code
< components >
// components/Home.js import React, { useState } from "react"; import "../styles/Home.css"; import loadable from "@loadable/component"; import testImg from "../public/test.svg"; const LoadableComponent = loadable(() => import("./Loadable")); const Home = () => { const [visible, setVisible] = useState(false); const onButtonHandler = () => { setVisible((prev) => !prev); console.log("clicked"); }; return ( <div className="homeContainer"> Hello world! <hr /> {visible && <LoadableComponent />} <button onClick={onButtonHandler}>Please Click Here~</button> <img src={testImg} alt="sex" width="200px" height="200px" /> </div> ); }; export default Home;
// components/Loadable.js import React from "react"; const Loadable = () => { return <div>Loadable Component is Here!</div>; }; export default Loadable;
< config >
// config/webpack.config.dev.js const path = require("path"); const HtmlWebpackPlugin = require("html-webpack-plugin"); const { CleanWebpackPlugin } = require("clean-webpack-plugin"); const MiniCssExtractPlugin = require("mini-css-extract-plugin"); const { WebpackManifestPlugin } = require("webpack-manifest-plugin"); const webpack = require("webpack"); module.exports = { mode: "development", entry: { app: path.resolve(__dirname, "..", "./index.js"), }, output: { path: path.resolve(__dirname, "dist"), filename: "[name].[chunkhash].js", chunkFilename: "[name].[chunkhash].js", }, devServer: { static: { directory: path.join(__dirname, "dist"), }, port: 9000, open: true, compress: true, }, devtool: "inline-source-map", module: { rules: [ { test: /\.html$/, exclude: "/node_modules", use: ["html-loader"], }, { test: /\.(js|jsx)$/, exclude: "/node_modules", use: { loader: "babel-loader", }, }, { test: /\.css$/, exclude: "/node_modules", use: [MiniCssExtractPlugin.loader, "css-loader"], }, { test: /\.scss$/, exclude: "/node_modules", use: [MiniCssExtractPlugin.loader, "css-loader", "sass-loader"], }, { // write image files under 10k to inline or copy image files over 10k test: /\.(jpg|jpeg|gif|png|svg|ico)?$/, use: [ { loader: "url-loader", options: { limit: 10000, fallback: "file-loader", name: "images/[name].[ext]", }, }, ], }, { // write files under 10k to inline or copy files over 10k test: /\.(woff|woff2|eot|ttf|otf)$/, use: [ { loader: "url-loader", options: { limit: 10000, fallback: "file-loader", name: "fonts/[name].[ext]", }, }, ], }, ], }, plugins: [ new HtmlWebpackPlugin({ template: path.resolve(__dirname, "..", "./public/index.html"), filename: "index.html", }), new MiniCssExtractPlugin({ filename: "static/css/[name].css", }), new WebpackManifestPlugin({ fileName: "assets.json", }), new CleanWebpackPlugin(), ], };
// config/webpack.config.prod.js const path = require("path"); const HtmlWebpackPlugin = require("html-webpack-plugin"); const { CleanWebpackPlugin } = require("clean-webpack-plugin"); const MiniCssExtractPlugin = require("mini-css-extract-plugin"); const { WebpackManifestPlugin } = require("webpack-manifest-plugin"); const webpack = require("webpack"); const childProcess = require("child_process"); const removeNewLine = (buffer) => { return buffer.toString().replace("\n", ""); }; module.exports = { mode: "production", module: "esnext", entry: { app: path.resolve(__dirname, "..", "./index.js"), }, optimization: { splitChunks: { cacheGroups: { vendor: { chunks: "initial", name: "vendor", enforce: true, }, }, }, }, output: { path: path.resolve(__dirname, "..", "./dist"), filename: "[name].js", chunkFilename: "[name].js", publicPath: "/dist/", }, module: { rules: [ { test: /\.html$/, exclude: "/node_modules", use: ["html-loader"], }, { test: /\.(js|jsx)$/, exclude: "/node_modules", use: { loader: "babel-loader", }, }, { test: /\.css$/, exclude: "/node_modules", use: [MiniCssExtractPlugin.loader, "css-loader"], }, { test: /\.scss$/, exclude: "/node_modules", use: [MiniCssExtractPlugin.loader, "css-loader", "sass-loader"], }, { // write image files under 10k to inline or copy image files over 10k test: /\.(jpg|jpeg|gif|png|svg|ico)?$/, use: [ { loader: "url-loader", options: { limit: 10000, fallback: "file-loader", name: "images/[name].[ext]", }, }, ], }, { // write files under 10k to inline or copy files over 10k test: /\.(woff|woff2|eot|ttf|otf)$/, use: [ { loader: "url-loader", options: { limit: 10000, fallback: "file-loader", name: "fonts/[name].[ext]", }, }, ], }, ], }, plugins: [ new webpack.BannerPlugin({ banner: ` Build Date :: ${new Date().toLocaleString()} Commit Version :: ${removeNewLine( childProcess.execSync("git rev-parse --short HEAD") )} Auth.name :: ${removeNewLine( childProcess.execSync("git config user.name") )} Auth.email :: ${removeNewLine( childProcess.execSync("git config user.email") )} `, }), new webpack.DefinePlugin({ TWO: JSON.stringify("1+1"), }), new HtmlWebpackPlugin({ template: "./public/index.html", filename: "index.html", }), new MiniCssExtractPlugin({ filename: "static/css/[name].css", }), new WebpackManifestPlugin({ fileName: "assets.json", }), new CleanWebpackPlugin(), ], };
< dist >
번들링 된 결과물 이 들어갈 자리
< public >
// public/index.html <!DOCTYPE html> <html lang="kr"> <head> <meta charset="UTF-8" /> <title>WEBPACK4-Example</title> <link rel="preconnect" href="https://fonts.googleapis.com" /> <link rel="preconnect" href="https://fonts.gstatic.com" crossorigin /> <link href="https://fonts.googleapis.com/css2?family=Roboto+Serif:ital,wght@1,100&display=swap" rel="stylesheet" /> </head> <body> <noscript>스크립트가 작동되지 않습니다!</noscript> <div id="root"></div> </body> </html>
+ RobotoSerif.Regular.tff, test.jpg, test.svg ( 테스팅 글꼴이랑 사진들 )
< styles >
// styles/Global.css body { font-family: "Roboto Serif", sans-serif; }
// styles/Home.css .homeContainer { background-color: bisque; }
< root directory >
// .babelrc { "presets": [ "@babel/preset-env", "@babel/preset-react" ], "plugins": [ "@babel/plugin-syntax-dynamic-import" ] }
// App.js import React from "react"; import Home from "./components/Home"; import "./styles/Global.css"; const App = () => { return ( <div className="App"> <Home /> </div> ); }; export default App;
// index.js import React from "react"; import ReactDOM from "react-dom"; import App from "./App"; ReactDOM.render(<App />, document.getElementById("root"));
// package.json { "name": "webpackexample", "version": "1.0.0", "description": "", "main": "index.js", "scripts": { "dev": "npx webpack serve --config ./config/webpack.config.dev.js", "build": "webpack --config ./config/webpack.config.prod.js" }, "keywords": [], "author": "", "license": "ISC", "dependencies": { "@babel/core": "^7.17.5", "@babel/preset-env": "^7.16.11", "@babel/preset-react": "^7.16.7", "@babel/runtime": "^7.17.2", "@loadable/component": "^5.15.2", "mini-css-extract-plugin": "^2.5.3", "react": "^17.0.2", "react-dom": "^17.0.2", "styled-components": "^5.3.3", "url-loader": "^4.1.1" }, "devDependencies": { "@babel/plugin-syntax-dynamic-import": "^7.8.3", "@babel/plugin-transform-runtime": "^7.17.0", "babel-loader": "^8.2.3", "clean-webpack-plugin": "^4.0.0", "css-loader": "^6.6.0", "file-loader": "^6.2.0", "html-loader": "^3.1.0", "html-webpack-plugin": "^5.5.0", "sass-loader": "^12.6.0", "style-loader": "^3.3.1", "webpack": "^5.69.1", "webpack-cli": "^4.9.2", "webpack-dev-server": "^4.7.4", "webpack-manifest-plugin": "^4.1.1" } }
Webpack Plugin
webpack plugin에 대해 간단히 모르는 사람을 위해 설명하겠다. 각각의 파일을 해석하는 데 들어가는 로더와 달리 번들된 결과물을 처리하는 것이 플러그인이다. 5개의 파일이 있다고 하면 로더는 각각의 파일을 모듈화 할 떄 호출되고(5번), 플로그인은 최종 1번 호출된다.
자주 쓰이는 플러그인
< Banner Plugin >
번들링된 파일의 상단에 배너(텍스트)를 달아주는 플러그인이다. webpack 기본 플러그인이기에 따로 설치는 필요없다. 빌드시 데이터들을 자동으로 기록해주는 방식으로 사용하면 유용할 듯 하다.
// dist/static/css/vendor.css /*! * * Build Date :: 2022. 2. 27. 오후 10:55:36 * Commit Version :: 9dac27e * Auth.name :: LE123123 * Auth.email :: heart20021010@gmail.com * */ .homeContainer { background-color: bisque; } body { font-family: "Roboto Serif", sans-serif; }
참고로 벤더 dist파일에 생성된 vendor파일은 청크간이나 번들링 된 파일간의 겹치는 패키지들을 별도의 파일로 추출해주는 코드입니다.
중복을 최소화 하기 위함입니다. => SplitChunks 옵션 사용 ( config/webpack.config.prod.js )
< Define Plugin >
각종 환경 변수들을 빌드시에 지정할 수 있는 플러그인이다. 개발 환경에 따라 서버 URL등의 정보가 바뀌는 경우가 많은데 그럴 때 미리 지정해두면 실수를 방지할 수 있다.
< HTML Template Plugin >
HTML을 동적으로 생성할 수 있는 플러그인이다. 해당 플러그인을 사용하면 index.html에서 js file을 로드하는 부분을 삭제해도 된다.
templateParameters, minify등의 옵션으로 생성될 html파일에 원하는 처리를 해줄 수 있다.
NODE_ENV === 'development'이면 title에 (" 개발용 ")이라는 접미사를 붙여주고 production인 경우 minify(공백, 줄바꿈, 주석 삭제)를 수행한다.
new HtmlWebpackPlugin({ template: "./public/index.html", filename: "index.html", templateParameters: { env: process.env.NODE_ENV === "development" ? "( 개발 용 )" : "( 배포 용 )", }, minify: process.env.NODE_ENV === "production" ? { collapseWhitespace: true, removeComments: true, } : false, }),
< Clean Webpack Plugin >
빌드되고 사용되지 않는 찌꺼기 파일들이나 캐시처럼 남아있는 파일들을 빌드 전에 삭제해주는 플러그인이다.
const { CleanWebpackPlugin } = require("clean-webpack-plugin") module.exports = { plugins: [ new CleanWebpackPlugin(), }
< Mini Css Extract Plugin >
webpack 기본 설정은 css파일이 js파일에 같이 번들링 됩니다. js파일이 비대해질 경우 그만큼 페이지 로딩 시간이 길어집니다. 이럴 때에는 js파일과 css파일을 분리하는 편이 도움이 됩니다.
const MiniCssExtractPlugin = require('mini-css-extract-plugin') module.exports = { module: { rules: [ { test: /\.css$/, use: [ process.env.NODE_ENV === 'production' ? MiniCssExtractPlugin.loader : 'style-loader', 'css-loader', ], }, ], }, plugins: [ ...(process.env.NODE_ENV === 'production' ? [new MiniCssExtractPlugin({ filename: '[name].css' })] : []), ], }
Mini Css Extract Plugin은 플러그인 뿐 아니라 loader에도 손을 봐주어야 한다 (style-loader 삭제, MCEP 생성자 loader 추가)
이 외에도 다양한 유용한 플러그인을 소개한 git페이지를 소개하겠다.
https://github.com/webpack/docs/wiki/list-of-plugins
GitHub - webpack/docs: [OLD] documentation for webpack
[OLD] documentation for webpack. Contribute to webpack/docs development by creating an account on GitHub.
github.com
사용자의 needs에 따라 유동적으로 추가하고 빼서 webpack을 다루는 실력을 늘리면 될 거 같다.!!
나의 코드와 직접 작성한 코드를 비교해 보면 공부가 수월해 질 것이다.
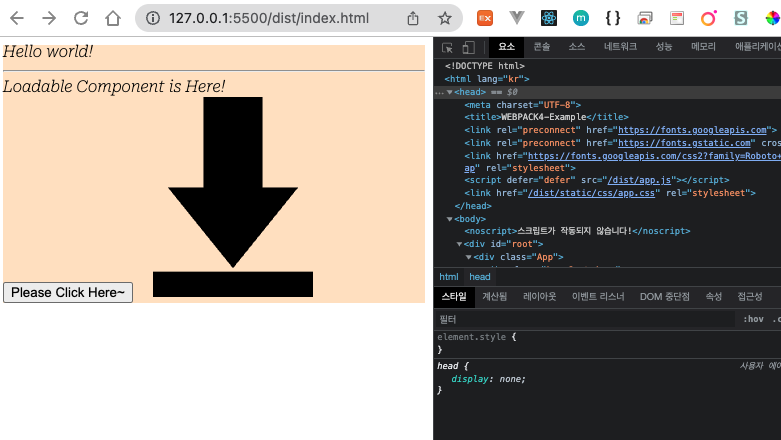
< 결과물
'React > ReactJs' 카테고리의 다른 글
| React - mongoDB ( mongoose ) (0) | 2022.03.12 |
|---|---|
| React - koa FrameWork (0) | 2022.03.09 |
| HTML - History API (0) | 2022.02.23 |
| React - ServerSideRendring (0) | 2022.02.22 |
| React - React.lazy & Suspense & Loadable Components (0) | 2022.02.22 |